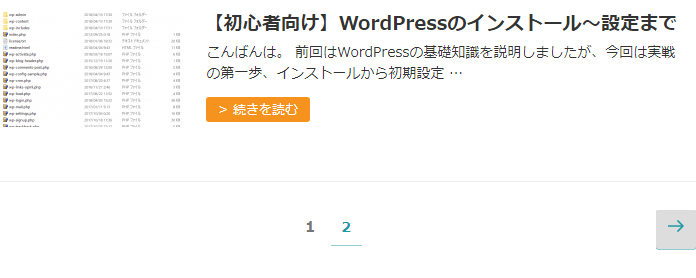
今回はワードプレスのページネーションのカスタマイズ方法を説明いたします。
実は、前回の記事が11記事目だったため、投稿後、トップページにページネーションが出現しました。※初期設定では、1ページ10記事ずつ表示される
その表示されたデフォルトのデザインが以下になります。

これはちょっと汚くてまずいですよね。
それゆえ、カスタマイズをすることにしました。
では、どこをいじればページネーションが変更されるのか。
ですが、その前にまず、2種類あることを確認しておきましょう。
① トップページのページネーション
② 記事ページのページネーション
この2つです。トップページは上で画像を紹介しました。
記事ページに関しましては、このページもそうですので、最下部を見ていただければわかりますが、
< 前の記事のタイトル 次の記事のタイトル >
このようになっています。
①の場所は、
wp-content > themes > twentyseventeen_child(使用しているテーマ) > index.php
まずここです。
■index.php———-
<?php
if ( have_posts() ) :
/* Start the Loop */
while ( have_posts() ) : the_post();
/* 略 */
get_template_part( ‘template-parts/post/content’, ‘excerpt’ );
endwhile;
the_posts_pagination( array(
‘prev_text’ => twentyseventeen_get_svg( array( ‘icon’ => ‘arrow-left’ ) ) . ‘<span class="screen-reader-text">’ . __( ‘Previous page’, ‘twentyseventeen’ ) . ‘</span>’,
‘next_text’ => ‘<span class="screen-reader-text">’ . __( ‘Next page’, ‘twentyseventeen’ ) . ‘</span>’ . twentyseventeen_get_svg( array( ‘icon’ => ‘arrow-right’ ) ),
‘before_page_number’ => ‘<span class="meta-nav screen-reader-text">’ . __( ‘Page’, ‘twentyseventeen’ ) . ‘ </span>’,
) );
else :
get_template_part( ‘template-parts/post/content’, ‘none’ );
endif;
?>
———-
上記の the_posts_pagination の部分がそれに該当します。
これは、wp-includes > link-template.php と連動しています。
2567行目に、同じ文字列「the_posts_pagination」を発見しました。
function the_posts_pagination( $args = array() ) {
echo get_the_posts_pagination( $args );
}
ここをいじれば変更されます。
しかし、今回はここはいじりません。
なぜかというと、①と②は、デザインは違うのですが、実は連動しているんです。
index.php と link-template.php のページネーション部分に「あああ」と書いて更新すると、①トップページのページネーションと、②記事ページのページネーション、両方に「あああ」と追記されてしまうわけです。
プログラムが複雑に絡み合っているので、ここを変更するのはやめておきましょう。難しいです。
では、どうすれば良いかと言いますと、分けて表示するのです。
index.phpに記載されていてる the_posts_pagination
▼ここから
the_posts_pagination( array(
‘prev_text’ => twentyseventeen_get_svg( array( ‘icon’ => ‘arrow-left’ ) ) . ‘<span class="screen-reader-text">’ . __( ‘Previous page’, ‘twentyseventeen’ ) . ‘</span>’,
‘next_text’ => ‘<span class="screen-reader-text">’ . __( ‘Next page’, ‘twentyseventeen’ ) . ‘</span>’ . twentyseventeen_get_svg( array( ‘icon’ => ‘arrow-right’ ) ),
‘before_page_number’ => ‘<span class="meta-nav screen-reader-text">’ . __( ‘Page’, ‘twentyseventeen’ ) . ‘ </span>’,
) );
▲ここまで
の部分は消してください。
そして、新たに別のワードプレス関数 paginate_links を使います。
一旦、整理しますと、デフォルトで
トップページのページネーションは the_posts_pagination で表示
記事ページのページネーションは the_posts_pagination で表示
このようになっていたのを
トップページのページネーションは paginate_links で表示
記事ページのページネーションは the_posts_pagination で表示
このようにする、ということです。
今回は、記事ページの方はデザインがデフォルトでも悪くないので、そのままにしておき、トップページの paginate_links のみカスタマイズします。
index.php の the_posts_pagination を消すと、かなりすっきりします。
以下、説明も記載しますので、ご覧ください。
■index.php———-
<?php
if ( have_posts() ) :
/* Start the Loop */
while ( have_posts() ) : the_post(); …記事があった場合ループする(1~10記事まで)
/* 略 */
get_template_part( ‘template-parts/post/content’, ‘excerpt’ );
endwhile; …記事表示終わり
(ここにあった the_posts_pagination を消した)
else : …記事がない場合
get_template_part( ‘template-parts/post/content’, ‘none’ );
endif;
?>
———-
そして、この下の部分に paginate_links を追記します。まとめて表示すると
■index.php———-
<?php
if ( have_posts() ) :
/* Start the Loop */
while ( have_posts() ) : the_post(); …記事があった場合ループする(1~10記事まで)
/* 略 */
get_template_part( ‘template-parts/post/content’, ‘excerpt’ );
endwhile; …記事表示終わり
(ここにあった the_posts_pagination を消した)
else : …記事がない場合
get_template_part( ‘template-parts/post/content’, ‘none’ );
endif;
?>
<?php …ここから追記
echo ‘<div class="top-pagination">’;
echo ‘<ul>’;
global $wp_query;
$big = 999999999; // need an unlikely integer
echo paginate_links( array(
‘base’ => str_replace( $big, ‘%#%’, esc_url( get_pagenum_link( $big ) ) ),
‘format’ => ‘?paged=%#%’,
‘current’ => max( 1, get_query_var(‘paged’) ),
‘total’ => $wp_query->max_num_pages
) );
echo ‘</ul></div>’;
?> …ここまで
</main><!– #main –>
</div><!– #primary –>
<?php get_sidebar(); ?>
</div><!– .wrap –>
———-
このようになります。
これは公式のページのソースを、divとulで囲ったものです。
よくわからない方は、これをコピーしていただいても構いません。
そして、paginate_linksは、wp-include/general_template.php と連動しています。
従って、この方法でトップページのページネーションをカスタマイズする場合、以下の3つのファイルを変更すれば良いことになります。
① twentyseventeen_child(使用しているテーマ) > index.php
② wp-include/general_template.php
③ twentyseventeen_child(使用しているテーマ) > style.css
①は、上に記載した、paginate_linksを追記したもの
②は、ファイルをTeraPadなどのエディタで開いて、文字列paginate_linksで検索してください。
デフォルトの場合、3714行目 function paginate_links( $args = ” ) { ここからが該当箇所となります。
その中の $page_links[] = のソースを必要に応じて変更します。
※私は、1つを以下のように変更しました。
$page_links[] = ‘<a class="next page-numbers"
↓
$page_links[] = ‘<a class="next-page-numbers"
③は新しくつくったクラスを記載するcssファイルです。
具体的には、index.phpのtop-pagination
そして、②で作成した next-page-numbers などです。
一応、cssも記載いたします。
ul {
list-style: none;
}
※ul liを横並びにする記述
.top-pagination {
text-align: center;
width:100%;
padding-top: 39px;
clear: both;
border-top: 1px solid #eee;
}
※上記のclear:bothはフロートの解除です。これを記載しないと、私のトップページのデザインの場合、ページネーションの左端がタイトル、記事の冒頭、続きを読むの左端と揃ってしまいます。つまり、コンテンツが左(サムネイル部分)右(タイトル、記事の冒頭、続きを読む)に分かれており、ページネーションが右側の下にしか表示されなくなってしまいます。
.top-pagination ul li {
text-align: center;
height:32px;
line-height:32px;
display: inline-block;
margin-left:3px;
}
.current-page-numbers {
width: 32px;
display: inline-block;
background:#979797;
color:#fff;
border: 1px solid #979797;
}
.next-page-numbers {
width: 32px;
display: inline-block;
border:solid 1px #666;
}
.next-page-text {
width: 54px;
border:solid 1px #666;
display: inline-block;
}
.prev-page-text {
width: 54px;
display: inline-block;
border:solid 1px #666;
}
よくわからない方は、とにかく上の①②③を変更することを抑えてください。
眺めていれば、わかってくるはずです。